In This Article
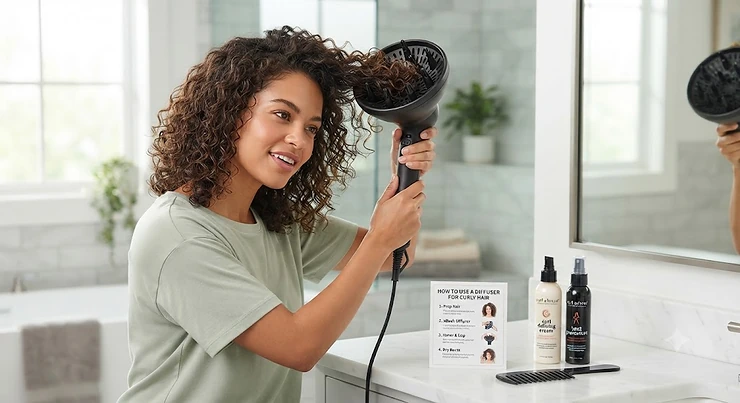
A diffuser for curly hair is a bowl-shaped attachment that clips onto a hair dryer and spreads the airflow across a wider area, so curls dry in place rather than getting blasted straight and frizzy. If you’ve ever finished blow-drying only to watch your curl pattern collapse into a triangle of frizz, the tool you were missing probably wasn’t a new shampoo — it was this one.
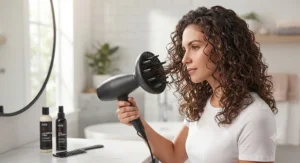
Here’s the thing nobody tells you at the till: not every diffuser suits every curl. A shallow dome that’s brilliant for loose 2B waves can flatten dense 4A coils, and a deep bowl built for thick hair can feel like overkill on fine 3A ringlets. Getting this wrong is why so many diffusers end up in a drawer after two uses. This guide breaks down seven genuinely good options sold on amazon.co.uk in 2026 — from budget-friendly universal attachments to a smart dryer-and-diffuser combo — with honest analysis of who each one actually suits, drawn from real specs and real aggregated reviewer sentiment. Curl typing itself has its own murky history worth knowing about; the widely used four-category system was originally created in the 1990s to market a stylist’s own product line before becoming an informal industry standard, which is worth bearing in mind whenever a product claims to be built for a specific “type.”
Whether you’re chasing definition on 3C spirals, trying to tame frizz on a wash day deadline, or just tired of your dryer fighting your natural texture, there’s a diffuser on this list built for your situation. We’ll also cover how to actually use one properly, where plopping fits into the routine, and the mistakes that quietly sabotage curl clumping. Prices below are shown as ranges rather than fixed figures, since Amazon pricing shifts constantly — always check the current price before buying.
Quick Comparison Table
| Diffuser | Best For | Price Range | Fit |
|---|---|---|---|
| Xtava Black Orchid | Thick, long curls needing volume | Mid-range | 1.7″-1.8″ nozzle |
| Diva Pro Styling XXL Pro | Budget buyers wanting true universal fit | Budget | Most dryer barrels |
| Segbeauty Deep Bowl | First-time diffuser buyers on a tight budget | Budget | 1.57″-1.97″ nozzle |
| BaByliss Turbo Smooth 5572U | An all-in-one dryer plus diffuser starter kit | Budget-mid | Matched dryer only |
| Remington PROluxe AC9140 | Consistent heat on fine or damage-prone curls | Mid-range | Matched dryer only |
| ghd Helios Diffuser | Salon-style curl separation and definition | Mid-premium | ghd Helios/Air only |
| Dyson Supersonic Nural | Tech-led drying with automatic scalp protection | Premium | Matched dryer only |
Looking at the spread above, the split really comes down to whether you already own a dryer worth keeping. If you do, a universal attachment like the Diva Pro or Xtava is the cheaper route in. If your current dryer is on its last legs anyway, a matched combo such as the BaByliss or Remington solves two problems in one purchase. The Dyson and ghd sit apart because you’re really paying for the dryer’s engineering, with the diffuser as a well-designed extra.
💬 Spotted your pick already? One click gets you live pricing and stock before it sells out!😊
Top 7 Diffusers for Curly Hair: Expert Analysis
1. Xtava Black Orchid Hair Diffuser — deepest bowl for thick, long curls
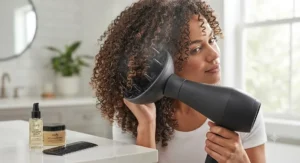
The Xtava Black Orchid earns its reputation with sheer capacity: this is a diffuser built for hair that overflows smaller bowls. It’s a universal attachment rather than a dryer, designed to click onto any barrel between roughly 1.7 and 1.8 inches in diameter.
The bowl houses more than 90 individual air vents plus long, finger-like prongs, and the whole unit is rated to withstand heat up to 485°F thanks to its fibreglass-reinforced plastic build. In practice, that vent density means air reaches root to tip simultaneously rather than blasting one section at a time, which is exactly what stops long curls from getting wind-whipped into frizz partway through drying.
Based on the spec comparison with shallower diffusers, this one is best suited to thick, long, or coily hair that needs somewhere to actually sit during drying — fine or short hair will find the bowl oversized and the lift underwhelming. Reviewers consistently note it dramatically cuts drying time on dense hair and holds curl shape well, though several also flag that finding a compatible dryer barrel took some trial and error, since “universal” claims don’t always hold up in practice.
Pros:
✅ Deep bowl swallows thick, long curls without spilling over
✅ Ninety-plus vents distribute heat evenly, cutting frizz
✅ Silicone grips help stop it slipping mid-dry
Cons:
❌ Only fits dryers with a 1.7-1.8 inch nozzle
❌ A minority of buyers report the fit loosening over time
Typically priced in the mid-£30s to low-£50s range on amazon.co.uk, it sits above the cheapest universal diffusers but well below any full dryer-diffuser combo — solid value if your hair genuinely needs the extra capacity.
2. Diva Pro Styling XXL Pro Universal Diffuser — best budget universal fit
Where the Xtava is deep and specific, the Diva Pro XXL Pro is built to be genuinely dryer-agnostic. Its soft, flexible plastic grip moulds around barrels of different lengths and thicknesses rather than relying on a fixed-diameter socket.
The bowl measures around 180mm across with a 30mm depth and 140mm total height — sizeable enough to cup a full head of medium-to-long hair in sections, though shallower than the Xtava’s design. What most buyers overlook about universal diffusers like this one is that the flexible grip is doing double duty: it’s both the fit mechanism and the thing preventing wobble at speed, so a firmer grip generally beats a wider opening.
This is the pick for anyone who’s bought a “universal” diffuser before and been disappointed. Reviewers who tried multiple universal options frequently single this one out as the rare model that lives up to the claim, fitting salon dryers as well as budget high-street ones. It’s a strong match for beginners who don’t yet know which dryer they’ll settle on long-term, or anyone replacing a diffuser without wanting to replace the whole dryer.
Pros:
✅ Genuinely fits almost any dryer barrel shape
✅ 180mm bowl handles a full head of curls in sections
✅ Soft flexible grip needs no tools to attach
Cons:
❌ Bulkier than dome-style diffusers when packing for travel
❌ Plainer looks than salon-branded alternatives at a similar price
Widely listed at the lower end of the price spectrum for diffusers — generally under the £20 mark, making it one of the most accessible entry points on this list. Always check current pricing, as universal attachments like this fluctuate more than branded dryer sets.
3. Segbeauty Deep Bowl Hair Diffuser — cheapest way into diffusing
If budget is the deciding factor, Segbeauty’s deep bowl diffuser is the most affordable route to trying diffusing before committing to a pricier setup. It’s another universal attachment, sized to fit nozzles between roughly 1.57 and 1.97 inches, with an adjustable airflow design.
The bowl depth is aimed squarely at thicker, coilier textures — the kind of hair that tends to get lost in shallow, flat diffusers. Here’s what the spec sheet won’t tell you, but user reports suggest: adjustable airflow diffusers like this one perform best when you actually use the lower settings, since the plastic build isn’t rated for sustained maximum heat the way pricier fibreglass models are.
For anyone with 4A-4C coils who’s never diffused before and doesn’t want to spend heavily to find out if they like the results, this is a sensible low-risk starting point. It won’t outlast a premium diffuser used daily for years, but for occasional use or as a spare for travel, it does the core job.
Pros:
✅ One of the cheapest deep-bowl diffusers on Amazon UK
✅ Adjustable airflow suits coily and thick textures
✅ Compact enough to pack for travel
Cons:
❌ Build quality feels less premium than pricier rivals
❌ Narrower nozzle compatibility than fully universal designs
Typically found under £15, this is squarely a starter-budget pick — genuinely useful, but don’t expect salon-grade longevity at this price point.
4. BaByliss Turbo Smooth Hair Dryer 5572U — best all-in-one dryer and diffuser combo
Rather than buying a diffuser to bolt onto an ageing dryer, the BaByliss Turbo Smooth solves both problems in one box. It’s a 2200W dryer that ships with a matched large diffuser attachment, ionic conditioning, and three heat settings with two speeds.
The 2200W motor means faster overall drying, which matters because less total heat exposure over a session generally means less cumulative damage — a genuinely useful trade-off for anyone diffusing several times a week. The bundled diffuser is sized to match the dryer’s airflow output precisely, so there’s none of the guesswork involved in matching a third-party attachment to an unfamiliar barrel.
Based on the spec comparison with pricier combos, this is the sensible choice for someone building a curly-hair routine from scratch who doesn’t want to buy a dryer and a diffuser as two separate purchases and hope they play nicely together. Reviewers of BaByliss’s diffuser dryers in this range consistently highlight the ionic conditioning cutting static and flyaways, with the main gripe being that the attached diffuser bowl is smaller than dedicated third-party options like the Xtava.
Pros:
✅ 2200W motor cuts overall drying time versus lighter dryers
✅ Diffuser and dryer arrive matched, no separate purchase needed
✅ Ionic conditioning helps tackle static and flyaways
Cons:
❌ Diffuser bowl is smaller than dedicated attachment options
❌ Noticeably heavier in hand during longer diffusing sessions
Generally priced in the £25-£40 range depending on retailer promotions, this remains one of the most complete budget-to-mid starter kits for curly hair on the UK market.
5. Remington PROluxe Hair Dryer AC9140 — most consistent heat control
Heat consistency is the quiet hero of good diffusing, and it’s the Remington PROluxe’s headline feature. Its OPTIheat technology is designed to hold a steady air temperature throughout the dry rather than letting it spike, paired with 2400W power, ionic conditioning, a diffuser, and two concentrator attachments.
What most buyers overlook about temperature spikes is that they’re often the real culprit behind mid-dry frizz, not just airflow turbulence — a diffuser can’t fully compensate for a dryer that swings hot and cold. Pairing a stable-heat dryer with a diffuser attachment tackles both causes of frizz at once rather than just one.
This model suits anyone with fine, colour-treated, or heat-sensitive curls who’s found other dryers either too aggressive or too inconsistent to trust on low settings. Reviewers repeatedly mention the diffuser attachment working well for wavy and curly hair specifically, alongside general praise for build quality, though some find switching between the multiple attachments fiddlier than expected.
Pros:
✅ OPTIheat technology keeps temperature steady through the whole dry
✅ Ships with diffuser plus two concentrators for versatility
✅ Ionic conditioning adds visible shine on dry curls
Cons:
❌ Diffuser prongs are shorter than specialist curl attachments
❌ Noticeably louder on its top speed setting
Sitting in the mid-range bracket, typically £45-£65, it’s a fair jump above the budget combos but still well short of premium territory — arguably the best value-for-heat-control pick here.
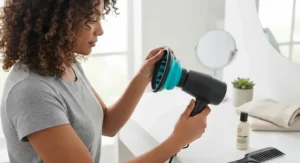
6. ghd Helios Diffuser Attachment — best for salon-style curl separation
The ghd Helios diffuser takes a different design approach entirely: instead of a deep concave bowl, it’s flatter, with notably long prongs built to separate sections of hair as you dry rather than cupping the whole head at once.
Those long prongs are the standout feature in practice — they let you actively lift and move individual sections during drying, which suits low-heat, low-lift finishing rather than the scrunch-and-hold method other diffusers favour. It’s compatible specifically with ghd’s own Helios and Air dryers, so this isn’t a universal purchase; you’re buying into the ghd ecosystem.
On paper this means it’s the pick for anyone who already owns or is planning to buy a ghd dryer and wants a diffuser that matches the brand’s precision-styling reputation. Reviewers describe it as well-made and durable, with the flatter shape working particularly well for people who want a smaller amount of lift rather than maximum volume — a genuinely different use case from the deep-bowl options earlier on this list.
Pros:
✅ Long prongs let you section and lift curls as you dry
✅ Fits securely onto Helios and Air dryers
✅ Flatter bowl suits low-heat, low-lift finishing styles
Cons:
❌ Only compatible with ghd’s own Helios or Air dryers
❌ The dryer itself is a separate, premium-priced purchase
The attachment alone typically sits in the £25-£35 range, but factor in the dryer — usually well over £100 — if you don’t already own one; this is a considered upgrade rather than an impulse buy.
7. Dyson Supersonic Nural with Wave+Curl Diffuser — smartest tech, gentlest on scalp
At the top of this list sits the Dyson Supersonic Nural, which pairs an intelligent dryer with a genuinely reworked diffuser attachment rather than the sometimes-criticised diffuser bundled with the original Supersonic.
The Wave+Curl diffuser offers two distinct modes — a pronged Diffuse mode for definition and a gentler, hands-free Dome mode — alongside a Scalp Protect feature that automatically moderates temperature the closer the diffuser gets to your head. That combination directly addresses the two biggest diffusing complaints: uneven definition and accidental scalp burns from holding a hot bowl too close for too long.
Here’s what the spec sheet won’t tell you, but user reports suggest: the intelligent heat regulation genuinely changes the experience for people who’ve been burned (sometimes literally) by cheaper dryers on high settings. One UK-based reviewer described their 3B curls as coming out defined and completely frizz-free even in humid conditions. It’s clearly aimed at buyers who want the fastest, most controlled result and are willing to pay accordingly, rather than anyone diffusing occasionally.
Pros:
✅ Scalp Protect mode adjusts heat automatically near the skin
✅ Two drying modes cover both diffusing and hands-free drying
✅ Noticeably faster drying time than attachment-only setups
Cons:
❌ Premium price sits well above every other pick here
❌ Heavier in the hand than most dedicated diffuser attachments
Priced roughly in the £330-£400 range, it’s a genuine investment rather than a casual purchase — but if you diffuse daily and value your time and scalp equally, the case for it is a strong one.
✨ Don’t Miss These Exclusive Deals!
🔍 Take your curl routine to the next level with one of these seven diffusers. Click through on any highlighted pick to check current pricing and availability on Amazon UK before you commit — the right diffuser really can be the difference between a frizzy Monday and salon-worthy curls every single day.
How to Use a Diffuser on Curly Hair: Step-by-Step
Buying the right diffuser only solves half the problem — technique accounts for the rest. Getting how to use a diffuser on curly hair right is less about fancy settings and more about patience and a light touch.
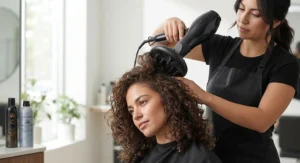
Start with soaking-wet hair straight out of the shower, applying your leave-in conditioner and curl cream while it’s still dripping, since product distributes far more evenly on wet strands than damp ones. Flip your head upside down and cup the first section into the diffuser bowl, pressing it gently against your scalp so the bowl is doing the scrunching for you rather than your hand. Turn the dryer on at its lowest heat and speed setting, hold that position for 20-30 seconds, then move to the next section — resist the urge to move the diffuser around mid-blast, since that’s what reintroduces the frizz you’re trying to avoid.
A common mistake in the first month of diffusing is drying to 100% before stopping. Most experienced curly-haired diffusers stop at around 80% dryness and let the rest air-dry undisturbed, since the final stretch of heat does more damage than styling good. Cool-shot the ends once you’re done to help set the cuticle and lock in shine.
Real-World Scenarios: Matching a Diffuser to Your Life
The student on a tight morning routine and a tighter budget: thick 3C curls, £20 to spend, needs to be out the door in 15 minutes. The Diva Pro XXL Pro or Segbeauty Deep Bowl covers this brief — both are budget universal fits that work with whatever dryer’s already knocking around a shared house.
The parent diffusing a child’s fine, damage-prone curls before school: consistency matters more than speed here, and heat spikes are the enemy. The Remington PROluxe’s OPTIheat stability is built for exactly this — steady, predictable heat that won’t surprise a wriggling five-year-old.
The professional who diffuses daily and values every saved minute: thick hair, thirty-minute morning window, willing to invest in speed. The Dyson Supersonic Nural’s faster drying and Scalp Protect mode justify the higher price precisely because daily use amortises the cost, and the time saved compounds over a working year.
Matching yourself to one of these three profiles — rather than simply buying whichever diffuser has the most five-star reviews — is usually the fastest route to a purchase you won’t regret.
Common Diffusing Problems and How to Fix Them
Problem: curls come out frizzy despite using a diffuser. This is almost always a heat-and-motion issue rather than a diffuser-quality issue. Drop to the lowest heat and speed setting, and stop moving the diffuser around mid-dry — hold, don’t wave.
Problem: one side of the head is flatter than the other. Uneven product application is the usual culprit. Apply leave-in and curl cream in even, deliberate sections rather than raking through all at once, so every part of the head gets equal coverage.
Problem: roots look flat while ends are defined. Try diffusing upside down for the first two-thirds of drying to encourage root lift, then finish right-side up for the crown.
Problem: the diffuser keeps slipping off the dryer nozzle mid-use. This is a fit problem, not a technique problem — a genuinely universal model like the Diva Pro XXL Pro, or double-checking your nozzle diameter against the Xtava or Segbeauty’s stated compatibility range, solves it outright.
Problem: hair feels crunchy and brittle after diffusing. Usually over-drying or too much heat. Stop at 80% dryness rather than 100%, and consider a lower heat setting even if it costs you a couple of extra minutes.
Does a Diffuser Reduce Frizz on Curly Hair?
Yes — a diffuser reduces frizz on curly hair by spreading a dryer’s airflow across a wide surface area instead of blasting it directly at the hair shaft, which minimises the movement and friction that disrupts the curl’s natural pattern and roughens the cuticle.
The mechanism is fairly straightforward once you understand it: direct nozzle airflow is essentially a concentrated jet, and jets move hair around. Every time a strand gets whipped mid-dry, its cuticle lifts slightly, and that’s what reads visually as frizz. A diffuser breaks that single jet into dozens of gentler streams via its vents and prongs, so hair dries largely undisturbed, in the shape it was styled into.
That said, a diffuser isn’t a frizz cure-all on its own. Reviewers and stylists consistently note that skipping a leave-in conditioner or heat protectant, or using too high a heat setting, will still produce frizz even with a top-tier diffuser attached. The tool reduces the mechanical cause of frizz; product and technique still need to handle the moisture side of the equation.
How to Choose a Diffuser for Natural Curly Hair
Choosing a diffuser for natural curly hair comes down to matching bowl depth, fit type, and heat control to your specific texture and routine, rather than simply buying whatever’s cheapest or most reviewed. Here’s the reasoning, step by step:
- Check your dryer’s nozzle diameter first. A universal diffuser is only universal within a stated range — measure before you buy, or you’ll be returning it.
- Match bowl depth to hair thickness and length. Thick, long, or coily hair needs a deep bowl like the Xtava’s; finer or shorter hair does better with a shallower design.
- Prioritise heat stability over raw wattage. A dryer with erratic heat, however powerful, undermines even the best diffuser attachment.
- Decide if you’re buying a diffuser or a diffuser-dryer combo. If your current dryer is ageing or underpowered, a matched combo like the BaByliss or Remington often works out better value than buying parts separately.
- Factor in low-heat settings and a cool shot. Heat exposure genuinely does add up over repeated sessions — one PMC-indexed study modelling repeated heat exposure on hair fibres found measurable structural change builds cumulatively, not just from a single high-heat session, which is the honest case for prioritising lower settings even if it costs a few extra minutes. Prolonged and frequent use of hair dryers to dry hair can cause heat damage to hair fibres, which is the whole reason gentler diffusing technique matters as much as the hardware.
- Read reviews for your specific curl type, not just star ratings. A 4.6-star average tells you little if most reviewers have straight or wavy hair; look for mentions of your own texture.
- Budget for the whole system, not just the attachment. A £15 universal diffuser on an unreliable 15-year-old dryer will underperform a £40 matched combo — factor total cost, not sticker price alone.
Best Diffuser for 3C Hair: What Actually Matters
3C hair — tight, well-defined corkscrew curls with high shrinkage — has specific needs that don’t always match the marketing on a diffuser box. Formal curl-typing systems remain genuinely contested among researchers, with a recent systematic review noting that hair typing based purely on visual shape criteria, separate from ethnicity, is still an active area of clinical debate — worth knowing before you trust a “made for 3C” label too literally.
In practice, what tends to matter most for tighter curl patterns is bowl depth and prong length rather than brand prestige. The Xtava Black Orchid’s extra-long prongs and deep bowl were specifically built with dense, coily textures in mind, and its 90-plus vents help prevent the frizz that tighter curl patterns are especially prone to when airflow isn’t evenly distributed. The Segbeauty Deep Bowl offers a similar depth-focused design at a fraction of the price, making it the sensible first purchase if you’re not yet sure a diffuser will suit your routine.
Reviewers with tighter curl patterns consistently mention that shallow, flat diffusers leave their curls compressed rather than lifted — so if your current diffuser is disappointing you, depth is usually the first thing to check before assuming the whole category isn’t for you.
The Curly Girl Method and Diffusing: What You Need to Know
The curly girl method — a set of low-manipulation, sulphate-free styling principles popularised in curl communities — treats diffusing as an optional but widely recommended finishing step, not a mandatory one. Plenty of curly girl method devotees air-dry exclusively; diffusing simply speeds the process up while, done correctly, staying broadly compatible with the method’s low-heat, low-disruption philosophy.
Where diffusing and curly girl method principles can clash is heat level. The method generally favours the gentlest possible drying, so if you’re following it strictly, that means low heat and low speed settings throughout, plus stopping well before 100% dryness rather than drying fully with the diffuser. A diffuser with genuinely stable low-heat performance, such as the Remington PROluxe’s OPTIheat system, sits more comfortably within curly girl method principles than a dryer that runs hot even on its lowest setting.
The other consideration is technique: curly girl method purists tend to favour the “praying hands” scrunching method before diffusing, applying product to soaking wet hair in upward scrunches to encourage clumping, then diffusing to set that clumping rather than create it from scratch.
Plopping Technique vs Diffusing: Which Should You Use?
Plopping — wrapping wet, product-loaded curls into a T-shirt or microfibre towel for 10-15 minutes to encourage clumping before any heat is applied — and diffusing aren’t actually competing methods; most experienced curly-haired people use both, in sequence.
Dyson’s own guidance on curl drying backs this up directly, describing plopping as a way to wrap hair in a cotton T-shirt for 10-15 minutes to help set curl formation before diffusing. Used together, plopping does the shaping work with zero heat, and diffusing then locks that shape in place and finishes the dry — the two methods solve different problems rather than duplicating each other.
If you only have time for one, plopping alone suits looser waves and 2A-2C patterns that don’t need much heat to set, while diffusing alone tends to work better for denser 3B-4C textures that benefit more from the lift and lockingin power heat provides. But for most curl types, ten minutes of plopping followed by a diffuse produces noticeably better definition than either technique used in isolation — it’s worth the extra ten minutes on wash day.
Curl Clumping and Diffusers: Getting Defined, Not Frizzy Curls
Curl clumping — several individual strands drying together as one defined ringlet rather than as separate frizzy hairs — is the single biggest factor separating “good curl day” from “bad curl day,” and diffusers play a direct role in whether it happens successfully.
Clumping starts before the diffuser ever gets switched on. Product application in soaking-wet hair, applied in sections with an upward scrunching motion, is what actually groups strands together; the diffuser’s job afterwards is purely to preserve that clumping while removing moisture, not to create it. This is exactly why touching or restyling curls mid-dry is so counterproductive — every touch has the potential to break clumps apart that took real effort to form.
Diffuser prong design genuinely affects clumping outcomes too. Long, widely-spaced prongs, like those on the Xtava or the ghd Helios, tend to preserve larger, chunkier clumps, while tighter, closer-set prongs on more compact diffusers can encourage smaller, more uniform curls. Neither is objectively better — it comes down to whether you prefer big, loose ringlets or tighter, more consistent definition, which is worth thinking about before you buy rather than after.
Safety, Regulations and Heat Damage: What UK Buyers Should Know
Every hair dryer and diffuser combination sold legally in the UK has to meet defined electrical safety standards, and it’s worth knowing what those actually cover before you buy from an unfamiliar seller. Under the Electrical Equipment (Safety) Regulations 2016, which apply to domestic electrical equipment operating within set voltage limits, manufacturers and importers are legally required to ensure equipment operates at a safe temperature, is properly insulated, and carries either UKCA or CE marking to show it’s been tested against these safety objectives. Third-party diffuser attachments sold separately from a dryer generally fall outside strict electrical certification since they contain no wiring themselves, but the dryer they’re attached to should always carry visible UKCA or CE marking — worth checking before buying an unfamiliar brand from a marketplace seller rather than a recognised retailer.
Beyond electrical safety, there’s the separate question of heat damage to the hair itself, which is a cumulative rather than one-off risk. Research modelling repeated heat exposure on hair fibres has found that damage builds progressively with frequency and intensity of use rather than appearing only after a single extreme session — which is the genuine, evidence-based case for keeping diffusing sessions on low-to-medium heat rather than assuming a “quick blast on high” does less overall damage. If your scalp is sensitive, a diffuser with an automatic scalp-protect feature, like the Dyson Nural’s, removes some of the guesswork around exactly how close and how long is safe.
Long-Term Cost and Maintenance of Diffuser Hair Dryers
A cheap universal diffuser paired with an old, unreliable dryer can end up costing more over two or three years than a single matched combo bought once — inconsistent heat shortens hair health and often means buying a replacement diffuser sooner as fit and grip wear out.
Maintenance itself is simple but frequently skipped: product residue builds up inside the vents and prongs over weeks of use, gradually reducing airflow efficiency and making drying take longer than it should. Wiping the diffuser with a damp cloth after each use, and giving it a proper rinse under warm water every few weeks, keeps performance consistent and extends its working life significantly. For universal attachments specifically, it’s worth periodically checking the grip hasn’t loosened from repeated heat cycling, since a diffuser that’s started slipping is both less effective and, near a scalp, a minor safety concern.
Total cost of ownership genuinely favours investing a bit more upfront in either heat stability (the Remington PROluxe) or a well-matched combo (the BaByliss) over repeatedly replacing budget universal attachments that wear out within a year of frequent use.
Frequently Asked Questions
❓ Do I need a special hair dryer to use a diffuser?
❓ How long should you diffuse curly hair?
❓ Can you diffuse 3C hair without frizz?
❓ Is plopping better than diffusing?
❓ How much does a good diffuser cost in the UK?
Conclusion
The right diffuser for curly hair isn’t the one with the most five-star reviews in the abstract — it’s the one whose bowl depth, fit, and heat stability actually match your texture, your current dryer situation, and how often you’re realistically going to use it. A student on a tight budget and a professional diffusing daily have genuinely different needs, and nothing on this list is a bad product; each one simply suits a different brief.
If you’re starting from nothing and want the lowest-risk entry point, the Diva Pro XXL Pro or Segbeauty Deep Bowl won’t break the bank while you work out whether diffusing suits your routine. If your current dryer is unreliable anyway, a matched combo like the BaByliss Turbo Smooth or Remington PROluxe solves two problems with one purchase. And if you diffuse daily and heat consistency or scalp comfort genuinely matters to your routine, the Dyson Supersonic Nural earns its premium price through engineering most budget options simply can’t match.
Whichever you choose, remember that the diffuser is only ever half the equation — technique, product, and patience do the rest. Get those right, and even a budget diffuser will outperform a premium one used carelessly.
Recommended for You
- Hair Dryer with Diffuser: 7 Best Picks for UK Curls 2026
- Best Dual Voltage Travel Hair Dryer UK 2026: 7 Top Picks Tested
- Best Travel Hair Dryer UK 2026: 7 Compact Picks That Actually Work
Disclaimer: This article contains affiliate links. As an Amazon Associate, I earn from qualifying purchases. If you purchase products through these links, we may earn a small commission at no additional cost to you.
✨ Found this helpful? Share it with your friends! 💬🤗
